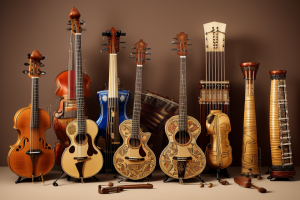
Have you ever dreamed of becoming a musical prodigy, but the hefty price tag of instruments stopped you in your tracks? Fear not, dear reader, for there is a solution that is both budget-friendly and simple to create – homemade instruments! And the best part? They don’t require any fancy tools or materials, just a little bit of creativity and some spare time. In this comprehensive guide, we’ll take a look at the easiest homemade instrument to make and how you can create it with ease. So, grab your toolkit and let’s get started on this musical journey!
Choosing the Right Instrument for Your Creation
Factors to Consider
When choosing the simplest homemade instrument to create, it is important to consider several factors. These factors will help you make an informed decision that will lead to a successful creation. Here are some of the most important factors to consider:
Skill Level
The skill level required to create the instrument is an important factor to consider. If you are a beginner, it is important to choose an instrument that is easy to make and does not require advanced skills. However, if you are an experienced maker, you may want to choose an instrument that is more challenging to create.
Availability of Materials
The availability of materials is another important factor to consider. Some instruments require specialized materials that may be difficult to find or expensive to purchase. It is important to choose an instrument that uses materials that are readily available and affordable.
Sound Quality and Tone
The sound quality and tone of the instrument is also an important factor to consider. Some instruments produce a better sound than others, and this can affect the overall quality of the instrument. It is important to choose an instrument that produces a good sound and has a pleasing tone.
Portability and Durability
The portability and durability of the instrument is also an important factor to consider. Some instruments are bulky and difficult to transport, while others are lightweight and easy to move around. It is important to choose an instrument that is portable and durable enough to withstand regular use.
In conclusion, when choosing the simplest homemade instrument to create, it is important to consider several factors, including skill level, availability of materials, sound quality and tone, and portability and durability. By taking these factors into account, you can make an informed decision that will lead to a successful creation.
Top Options for Beginners
If you’re new to creating homemade instruments, it’s important to choose an instrument that is easy to learn and doesn’t require a lot of specialized knowledge or tools. Here are five top options for beginners:
- Recorder: The recorder is a woodwind instrument that is simple to learn and can produce a range of melodies. It consists of a cylindrical body with a whistle mouthpiece and a flared bell. To play the recorder, you blow air into the mouthpiece and cover and uncover the holes with your fingers to produce different notes.
- Ukulele: The ukulele is a small, four-stringed instrument that is easy to learn and produces a cheerful, upbeat sound. It has a bright, ringing tone and is often used in folk and Hawaiian music. To play the ukulele, you strum the strings with a pick or your fingers and fret the strings with your fingers to produce different notes.
- Didgeridoo: The didgeridoo is a long, narrow instrument that is traditionally made from a eucalyptus branch. It produces a deep, resonant sound and is commonly used in Aboriginal music. To play the didgeridoo, you blow air into the mouthpiece and vibrate your lips to produce a continuous drone.
- Harmonica: The harmonica is a small, portable instrument that is easy to learn and can produce a range of blues and rock ‘n’ roll sounds. It consists of a plastic or metal comb and a set of reeds that vibrate to produce different notes. To play the harmonica, you blow air into the mouthpiece and cover and uncover the holes with your fingers to produce different notes.
- Jew’s harp: The Jew’s harp is a small, U-shaped instrument that is traditionally made from metal or wood. It produces a clear, high-pitched sound and is commonly used in folk and traditional music. To play the Jew’s harp, you hold it between your teeth and pluck the string with your finger to produce different notes.
Understanding the Basics of Sound Production
How Instruments Produce Sound
Sound is created when an object vibrates, producing a sound wave that travels through the air. In musical instruments, the vibration is typically produced by vibrating strings or membranes. These strings or membranes are usually made of materials that are flexible, such as wood, metal, or animal hide. When the strings or membranes vibrate, they create a sound wave that is amplified by a resonating chamber.
The resonating chamber is an important part of the instrument because it helps to amplify the sound produced by the vibrating strings or membranes. The resonating chamber can be made from a variety of materials, including wood, metal, or even the human body. The size and shape of the resonating chamber can also affect the sound produced by the instrument.
In addition to vibrating strings or membranes, some instruments use the mouth or fingers to modify the sound produced. For example, a clarinet produces sound by vibrating a reed and the player’s mouth shapes the sound. Similarly, a flute produces sound by vibrating a piece of wood and the player’s fingers cover the holes on the instrument to modify the sound.
Overall, understanding how instruments produce sound is an important aspect of creating homemade instruments. By understanding the basics of sound production, you can create an instrument that produces the desired sound and quality.
Key Elements of Homemade Instruments
Homemade instruments are a great way to learn about sound production and create unique musical instruments. The key elements of homemade instruments include:
Materials
The materials used to create a homemade instrument can greatly affect its sound and durability. Some common materials used for homemade instruments include:
- Wood: Wood is a popular choice for homemade instruments because it is readily available and has a natural resonance. Different types of wood can produce different tones, so choosing the right type of wood is important.
- Metal: Metal is another popular choice for homemade instruments. It can produce a wide range of tones and is durable, making it a good choice for instruments that will be used frequently.
- Plastic: Plastic is a versatile material that can be used to create a variety of homemade instruments. It is relatively inexpensive and easy to work with, making it a good choice for beginners.
Design
The design of a homemade instrument can also have a significant impact on its sound. Some common designs include:
- String instruments: String instruments, such as guitars and violins, are some of the most popular homemade instruments. They are typically designed with a body, neck, and strings.
- Wind instruments: Wind instruments, such as flutes and trumpets, are designed to produce sound by blowing air through a tube. They typically have a mouthpiece and a body.
- Percussion instruments: Percussion instruments, such as drums and maracas, are designed to produce sound by striking or shaking them. They can be made from a variety of materials and can have different shapes and sizes.
Shaping and carving
The shape and size of a homemade instrument can also affect its sound. Shaping and carving the instrument can help to enhance its natural resonance and produce a more pleasing tone. Some common techniques for shaping and carving homemade instruments include:
- Sanding: Sanding the instrument can help to smooth out any rough edges and create a more uniform surface.
- Drilling: Drilling small holes in the instrument can help to enhance its resonance and produce a clearer tone.
- Carving: Carving the instrument can help to change its shape and size, which can affect its sound.
Tuning and adjustments
Once the instrument is built, it may need to be tuned and adjusted to produce the desired sound. Tuning involves adjusting the strings or reeds to produce the correct pitch. Adjustments may also be needed to change the shape or size of the instrument to produce a better tone.
Overall, understanding the key elements of homemade instruments is an important part of creating a successful instrument. By carefully selecting materials, designing the instrument, shaping and carving it, and tuning and adjusting it, you can create a unique and enjoyable musical instrument.
Crafting Your Own Instrument: Step-by-Step Guide
Recorder
- Gather materials
To craft a recorder, you will need the following materials:
- 2 plastic or wooden drinking straws
- 1 small piece of metal tubing
- 1 plastic or wooden dowel rod
- 1 rubber band
- 1 pair of scissors
- 1 ruler or measuring tape
- Sandpaper
- 1 plastic bag or container
- Paint (optional)
- Assemble the instrument
Begin by cutting one of the straws in half using the scissors. The second straw should be cut into three equal parts using the ruler or measuring tape. Take one of the shorter pieces of the second straw and cut it into two equal halves. Then, cut the other shorter piece of the second straw into four equal parts.
Next, take the longer piece of the second straw and wrap a rubber band around it. This will serve as the mouthpiece of the recorder. Take the longer piece of the first straw and wrap another rubber band around it. This will serve as the base of the recorder.
Take the metal tubing and wrap a rubber band around it as well. This will serve as the middle section of the recorder. Carefully insert the longer piece of the first straw into the shorter piece of the second straw, creating a “U” shape. Insert the metal tubing into the open end of the “U” shape.
Now, take the longer piece of the second straw and place it over the top of the metal tubing. This will create the mouthpiece of the recorder. Take the other shorter piece of the second straw and insert it into the top of the metal tubing. This will serve as the bottom of the recorder.
- Create the mouthpiece
Take the longer piece of the second straw and use sandpaper to create a slight indentation at the top. This will create a comfortable place for your lips to rest when playing the recorder.
- Tune the recorder
To tune the recorder, blow air into the mouthpiece and adjust the position of the bottom piece of the second straw until you achieve the desired pitch. Experiment with different lengths and shapes of the pieces to find the best combination for your recorder.
Congratulations, you have now crafted your very own recorder! With a little bit of practice, you can create beautiful melodies with your homemade instrument.
Ukulele
1. Gather materials
To create a ukulele, you will need the following materials:
- A 2-foot length of 1-inch diameter wooden dowel
- A 12-inch length of 3/4-inch diameter wooden dowel
- A piece of 1/4-inch thick hardwood veneer
- A piece of 1/4-inch thick softwood veneer
- A piece of 1/4-inch thick plywood
- A ukulele bridge
- A ukulele saddle
- 4 metal tuning pegs
- Nylon strings (4)
- A piece of 1/4-inch dowel rod
- A drill
- A hammer
- A sandpaper
- A saw
- A screwdriver
- A glue gun
- Glue
2. Cut and shape the body
To cut and shape the body of the ukulele, follow these steps:
- Cut the 2-foot length of wooden dowel in half, so you have two pieces of 12 inches each.
- Cut the 12-inch length of wooden dowel in half, so you have two pieces of 6 inches each.
- Cut the hardwood veneer to 3 1/2 inches by 8 inches.
- Cut the softwood veneer to 3 1/2 inches by 8 inches.
- Cut the plywood to 12 inches by 16 inches.
- Cut the ukulele bridge to the appropriate size.
- Cut the ukulele saddle to the appropriate size.
- Cut the 1/4-inch dowel rod to 3 inches.
3. Attach the neck
To attach the neck to the body of the ukulele, follow these steps:
- Drill a hole in the center of each of the 6-inch wooden dowel pieces.
- Sand the edges of the holes to smooth them out.
- Insert the 3-inch dowel rod into the holes.
- Attach the hardwood veneer to the top of the dowel rods using glue.
- Attach the softwood veneer to the bottom of the dowel rods using glue.
- Attach the plywood to the top of the dowel rods using glue.
- Attach the ukulele bridge to the top of the plywood using glue.
- Attach the ukulele saddle to the bottom of the plywood using glue.
4. Add strings and tuning pegs
To add strings and tuning pegs to the ukulele, follow these steps:
- String the nylon strings across the ukulele.
- Attach the tuning pegs to the top of the ukulele.
- Tune the ukulele to the appropriate tuning.
By following these steps, you can create your own ukulele from scratch. The ukulele is a simple instrument to make, and it can be a fun and rewarding project for anyone who enjoys crafting and music.
Didgeridoo
Crafting a didgeridoo is a unique and rewarding experience for musicians and craftspeople alike. The didgeridoo is a traditional Aboriginal instrument that is easy to make and offers a unique sound. To craft your own didgeridoo, follow these steps:
- Choose the right materials:
The didgeridoo is typically made from a single piece of wood, such as eucalyptus. The wood should be dry and free of knots and other imperfections. You can also use other materials, such as bamboo or metal, but wood is the most traditional and commonly used material. - Carve the instrument:
The didgeridoo is typically carved into a cone shape, with a small opening at one end and a larger opening at the other. To carve the didgeridoo, you will need a knife or other cutting tool, as well as sandpaper and a file. Start by marking the shape of the didgeridoo on the wood, then use the knife to cut out the basic shape. Use the sandpaper and file to smooth out the surface and create the desired shape. - Create the mouthpiece:
The mouthpiece of the didgeridoo is the small opening at one end of the instrument. To create the mouthpiece, you will need a small piece of wood or other material, such as metal or plastic. Use the knife to shape the mouthpiece to the desired size and shape, then use sandpaper and a file to smooth out the surface. - Learn the basics of playing:
Once you have crafted your didgeridoo, it’s time to learn how to play it. The didgeridoo is played by blowing air through the mouthpiece and creating a vibration with the lips. It takes practice to master the technique, but with time and patience, you can learn to play a variety of melodies and rhythms on your homemade didgeridoo.
Harmonica
To craft your own harmonica, you will need the following materials:
- Six sheet metal reeds
- Comb
- Wooden or plastic mouthpiece
- Two brass screws
- A pair of pliers
-
A nail file or sandpaper
-
Assemble the harmonica
To assemble the harmonica, follow these steps:
- First, take the six sheet metal reeds and file off the edges so that they are flat.
- Next, take the wooden or plastic mouthpiece and drill a hole in the center.
- Screw the mouthpiece onto the comb, making sure it is secure.
- Place two of the sheet metal reeds onto the comb, making sure they are parallel to each other.
- Use the pliers to bend the reeds slightly, creating a gap between them.
- Repeat this process with the remaining four reeds, spacing them evenly apart on the comb.
- Finally, use the nail file or sandpaper to smooth out any rough edges and ensure that the harmonica is properly aligned.
- Learn the basics of playing
Once you have assembled your harmonica, it’s time to learn how to play it. Here are some basic tips to get you started:
- Hold the harmonica with the mouthpiece facing you and the holes pointing out.
- Cover the holes on the harmonica with your fingers as you inhale, creating a seal around the mouthpiece.
- Exhale and blow air into the harmonica to create sound.
- To play different notes, adjust the placement of your tongue and lips on the mouthpiece.
- Practice different techniques such as bending and shaking the harmonica to create different sounds.
- Experiment with different techniques
Once you have mastered the basics of playing the harmonica, you can experiment with different techniques to create more complex sounds. Here are some techniques to try:
- Overblowing: Place your lips on the mouthpiece and blow air into the harmonica, but keep your embouchure (the position of your lips and facial muscles) the same as when you play a note. This will produce a higher note.
- Overbending: Use your tongue to push the reed further out of the comb when you bend a note. This will produce a lower note.
- Tongue blocking: Place your tongue behind the reed you want to play and blow air into the harmonica. This will produce a different sound.
- Vamping: Hold a single note by covering the hole with your finger, and then play other notes around it with your tongue and lips.
With these techniques, you can create a variety of sounds and melodies on your homemade harmonica. So, get creative and enjoy the process of crafting and playing your very own instrument!
Jew’s harp
The Jew’s harp is a simple yet fascinating instrument that can be easily crafted at home. Here’s a step-by-step guide to help you create your very own Jew’s harp:
- Gather materials
To create a Jew’s harp, you will need the following materials:
- Two small metal bars (such as music wire or thin coat hanger wire)
- A wooden or plastic frame
- A small piece of rubber or cork
-
A small metal file or sandpaper
-
Create the frame
The frame of the Jew’s harp is the base on which the metal bars will be attached. To create the frame, take the wooden or plastic board and mark the center point. Drill a small hole at the center point and insert the small metal bar, leaving it protruding on one end.
- Shape the resonator
The resonator is the metal bar that produces the sound when plucked. Take one of the metal bars and shape it into an L-shape, with the short arm being slightly longer than the long arm. Use the file or sandpaper to smooth any rough edges.
- Attach the resonator
Using the pliers, bend the long arm of the resonator at a 90-degree angle and attach it to the frame, so that it is perpendicular to the short arm. Use the pliers to bend the short arm of the resonator into a U-shape, with the shorter arm pointing towards the long arm.
- Add the rubber or cork
Take the small piece of rubber or cork and attach it to the bottom of the short arm of the resonator. This will help to create a clear and resonant sound when the instrument is played.
- Learn the basics of playing
Once you have created your Jew’s harp, it’s time to learn how to play it. Hold the instrument with the frame in one hand and the resonator in the other. Use your thumb to press down on the rubber or cork and pluck the resonator with your finger. Experiment with different plucking techniques and angles to create different sounds and melodies.
With these simple steps, you can create your very own Jew’s harp and begin exploring the exciting world of homemade instruments.
Enhancing Your Homemade Instrument
Modifying and Upgrading
One of the most exciting aspects of creating your own homemade instrument is the ability to modify and upgrade it to suit your personal preferences. Here are some simple ways to enhance your instrument:
- Changing strings or reeds: Depending on the type of instrument you’ve created, you may be able to change the strings or reeds to alter the sound. For example, if you’ve made a stringed instrument, try using different gauges of strings or experimenting with thicker or thinner strings. If you’ve made a wind instrument, try changing the reeds to find the perfect tone.
- Adding or adjusting resonators: Resonators are devices that amplify the sound of your instrument. You can add or adjust resonators to enhance the volume and quality of your instrument’s sound. Experiment with different types of resonators, such as metal or wooden ones, to find the best fit for your instrument.
- Enhancing the sound with accessories: There are many accessories you can use to enhance the sound of your homemade instrument. For example, you can use a pickup to amplify the sound of your instrument, or add a mute to control the volume. You can also experiment with different types of strings or reeds to find the perfect tone for your instrument.
Tips for Improving Sound Quality
Improving the sound quality of your homemade instrument can be achieved through various techniques. Here are some tips to consider:
Proper playing technique
Proper playing technique is essential in producing good sound quality. This includes the right grip, finger placement, and bowing technique. For example, in making a homemade violin, the player should place their fingers on the fingerboard correctly and use the appropriate bowing technique to produce a clear and resonant sound.
Regular tuning and maintenance
Regular tuning and maintenance of your homemade instrument can also help improve its sound quality. This includes tightening or loosening the strings, adjusting the pegs, and cleaning the instrument. By keeping your instrument in good condition, you can ensure that it produces the best possible sound.
Experimenting with different materials and designs
Experimenting with different materials and designs can also help improve the sound quality of your homemade instrument. For example, using different types of wood for the body and neck of a guitar can affect its sound. You can also experiment with different string materials and thicknesses to achieve the desired tone. By exploring different designs and materials, you can create a unique sound that is tailored to your preferences.
Join the Community of Homemade Instrument Enthusiasts
Online Resources and Communities
Are you interested in creating your own homemade instrument but don’t know where to start? There are a variety of online resources and communities available to help you on your journey. From forums to social media groups, instructional videos and tutorials, there is no shortage of information and support available to homemade instrument enthusiasts.
Forums
One of the best places to find information and connect with other homemade instrument enthusiasts is through online forums. These communities allow you to ask questions, share your own creations, and learn from others who have experience making their own instruments. Some popular forums for homemade instruments include Instructables, DIY.org, and The Wood Whisperer.
Social media groups
Social media platforms like Facebook and Instagram are also great places to find information and connect with other homemade instrument enthusiasts. Many people share their creations and offer advice in social media groups dedicated to homemade instruments. You can also join online communities focused on specific types of instruments, such as ukuleles or banjos.
Instructional videos and tutorials
If you prefer to learn through visual aids, there are many instructional videos and tutorials available online. These resources can help you learn how to make a variety of homemade instruments, from simple wooden flutes to complex electronic devices. Websites like YouTube and Vimeo are great places to find instructional videos, and many websites also offer written tutorials and step-by-step guides.
No matter what type of homemade instrument you want to create, there are plenty of online resources and communities available to help you along the way. Joining these communities can provide you with valuable information, support, and inspiration as you embark on your homemade instrument-making journey.
Sharing Your Creation
As a homemade instrument creator, sharing your creation with others is an essential part of the process. It allows you to showcase your work, receive feedback, and connect with other enthusiasts. Here are some ways to share your homemade instrument:
Local events and gatherings
One of the best ways to share your creation is by attending local events and gatherings. Many cities have events dedicated to showcasing homemade instruments, such as maker fairs, science festivals, and community markets. These events provide an excellent opportunity to demonstrate your instrument, interact with other makers, and receive feedback from the public.
To get started, research local events in your area and reach out to the organizers to inquire about participating. Make sure to have a well-made instrument to showcase, as well as any relevant information, such as the materials used and the process of making it.
Online showcases and competitions
Another way to share your creation is through online showcases and competitions. Many websites and social media platforms cater to homemade instrument enthusiasts, such as Instagram, YouTube, and online forums. These platforms allow you to share photos, videos, and information about your instrument, as well as connect with other makers from around the world.
In addition, there are many online competitions and challenges dedicated to homemade instruments, such as the Maker Faire and the Instrument Making Competition. These competitions provide an opportunity to showcase your work to a larger audience and receive recognition from experts in the field.
To get started, research online platforms and communities related to homemade instruments and join the conversation. Share photos and videos of your instrument, as well as information about the process of making it. Engage with other makers and seek feedback to improve your work.
Collaborating with other instrument makers
Collaborating with other instrument makers is another way to share your creation and learn from others. Collaboration can take many forms, such as building a joint instrument, exchanging ideas and techniques, or simply discussing your work with others.
To get started, reach out to other instrument makers in your area or online communities and propose a collaboration. You can also attend workshops or meetups dedicated to homemade instruments, where you can meet other makers and collaborate on projects.
In conclusion, sharing your homemade instrument is an essential part of the process and provides an opportunity to showcase your work, receive feedback, and connect with other enthusiasts. Whether it’s attending local events, participating in online showcases, or collaborating with other makers, there are many ways to share your creation and become a part of the homemade instrument community.
FAQs
1. What is the easiest homemade instrument to make?
The easiest homemade instrument to make is a tin can drum. It only requires a few simple materials, such as a tin can, a piece of string, and a pencil or skewer. To make the drum, you will need to pierce the tin can with the pencil or skewer and then attach the string to it. You can then use your hands or a pencil to tap on the string and create a rhythm.
2. How do I make a tin can drum?
To make a tin can drum, you will need a tin can, a piece of string, and a pencil or skewer. First, pierce the tin can with the pencil or skewer by making a small hole in the center of the bottom of the can. Then, tie the string to the pencil or skewer and attach it to the hole in the can. Finally, you can use your hands or a pencil to tap on the string and create a rhythm.
3. What materials do I need to make a tin can drum?
To make a tin can drum, you will need a tin can, a piece of string, and a pencil or skewer. You may also want to use a ruler or scissors to help you measure and cut the string to the correct length.
4. How do I play a tin can drum?
To play a tin can drum, simply tap on the string with your hands or a pencil. You can create different rhythms by tapping on different parts of the string or by changing the speed of your taps. Experiment with different techniques to find what works best for you.
5. Can I make other types of homemade instruments?
Yes, there are many different types of homemade instruments that you can make, such as a harmonica, a flute, or a guitar. These instruments may require more materials and skills to make, but they can be a fun and rewarding project for those who are interested in music and crafting.